Category Archives: Project 3: Form

Exercise 4: Energy

This exercise was all about movement. I started the exercise by looking at artists who manage to show movement in their figure drawing. The first drawing I looked at was the example we were given. The Tango by Marcel Vertes.

8320A671-9773-4BE8-B2D2-D63A81EC3022

This drawing shows movement through the rapidly drawn lines. When viewing this drawing I feel like I have captured a moment in the dance. The undulating lines appear to flow with the movement of the dance.

The next work I looked at was the drawings of Don Gale. Below are some examples of his work.

A5E29AFE-5B3D-4FF4-B9CC-B8F0E2AE4480

http://dongalestudio.com/

Gales work is very energetic and shows movement through his quick expressive lines. His drawings are devoid of detail but his use of repeated and close lines give the impression of movement.

Before starting my own figure drawings I experimented with creating abstract marks that depict movement. I used a selection of materials including, Indian ink, charcoal, marker pen, tipex pen, biro and pencil. Below are my drawings:

240CAEBE-87FB-443C-887F-B2A56D702AC1

When creating these marks, I tried to feel the movement in my wrists and hands and I tried to be expressive and free with my movements. On reflection I feel my marks do show movement. Therefore it is important that I try to implement these marks in my future figure drawings.

For the main part of this exercise I used my four year old son Teddy.

I was asked to get my model (Teddy)  to adopt some dynamic positions.

I worked on blue a3 sugar paper and used charcoal, biro, white crayon and marker pen.

When drawing I tried to convey the sense of energy in each pose. I tried to concentrate on the energy radiating out of Teddy rather than focus on the details. I also tried to make my marks quick and expressive in order to show movement. Below are my drawings:

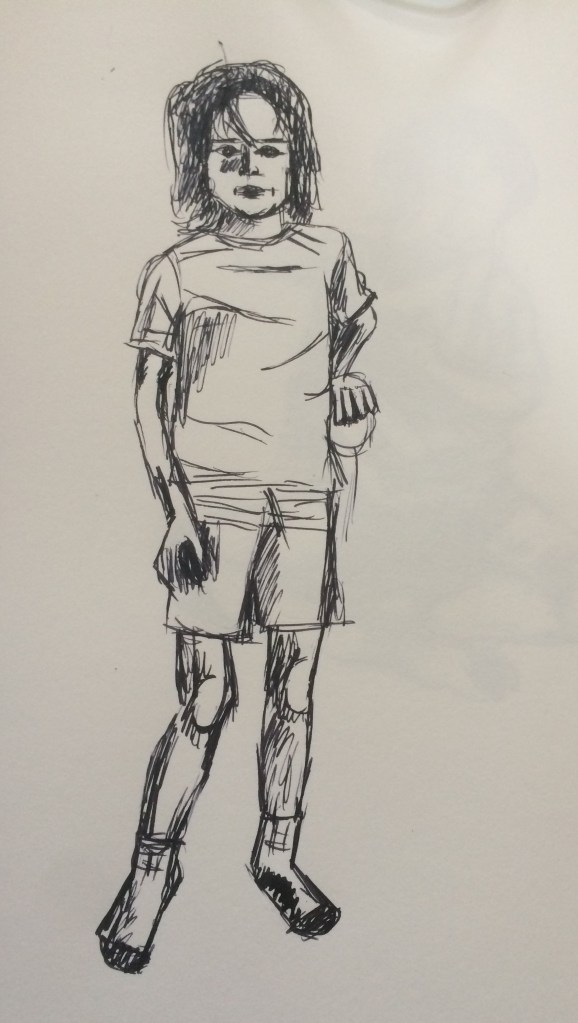
For my first drawing I started with a black marker pen. I used this pen in my experiments and felt it showed movement effectively. However when I used it for my figurative drawing, it made my drawing of my son look cartoony and I didn’t manage to capture his energy at all. I thus decided to add other materials, so I worked with my biro and my white pencil to try to show movement and energy. This did improve my drawing however I decided to not use this marker pen again.

For my second drawing I started too big and only managed to fit the head and main torso in. Rather than start again I decided to carry on anyway. I experimented with lines and marks in order to show energy. However on reflection this drawing doesn’t show much energy or movement. Maybe this is because I only managed to fit in the top half of my son or maybe my marks were just ineffective at showing this?

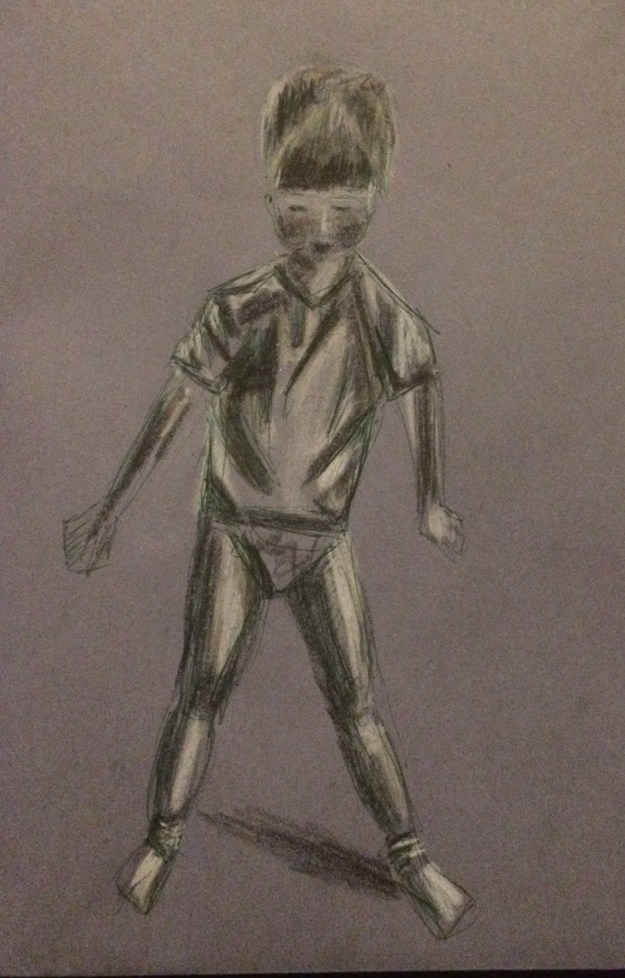
My next couple of drawings were more effective in that I managed to fit my model on the page. I also managed to create marks that showed my sons energy more effectively.

Overall this exercise has been beneficial as it has made me think about portraying energy and movement in figurative work. This is something I would like to develop further in my later work.

Exercise 3: Stance

For this exercise I was asked to look at the line of balance or the centre of gravity in a figure. I was then asked to mark the central axis in my drawings.

This time I drew my son Leo. I worked with ink and a sharpened stick on white paper. I chose to work with ink as I haven’t worked with ink so far in this project.

I initially asked my 6 year old son to stand still so I could move around him before I began to draw to get a sense of where he was in his allotted space and to identify his centre of gravity.

I then completed a series of quick drawings taking no longer than 5 minutes each. Below are my drawings.

I found working with ink quite unforgiving as mistakes could not be erased, however as the drawings were so quick I didn’t have time to erase mistakes anyway.

Before drawing I marked with ink the central axis, however as my drawings are quite scratchy this is not evident in my final drawings, however I did find this a very useful starting point for all of my drawings.

When reviewing my drawings my main concern was accuracy and proportions. In most of my drawings the hands are drawn too small. This is an area I have struggled with so I really do need to practice. Also when looking at my drawings I don’t feel it is immediately obvious that my drawings are of the same child? Whilst I can see my son in all of my drawings I feel they are quite inconsistent with areas that I have drawn correctly and areas I haven’t.

Exercise 2: Essential elements

For this exercise I was asked to draw a sequence of six different poses lasting ten minutes each.

I again drew my husband as we are in lockdown and I have no other options. He was working so I had to work around him working.

This time I used a white pencil on black paper.

When drawing I tried to emphasise his three dimensional form and I tried to remember the work I did on basic shapes when blocking out my drawings.

I drew the whole figure in each of my drawings and didn’t concern myself too much with detail. I tried to focus on proportion whilst at the same time creating a sense of weight and three dimensional form.

Below are my drawings.

The first thing I notice about my drawings when putting them together is the proportions are different. For example in drawing 2 & 5 the heads appear larger than in the other drawings. Also in drawing 5 the foot appears smaller than in the other drawings. My first assumption for these differing proportions was that I had just got them wrong. However I now think it was just the way he was positioned or the way I was positioned when drawing him. For example where the heads look bigger in relation to the rest of the body this is because I was closer to his head than the rest of his body. This is also called foreshortening a technique I looked at in earlier exercises.

What I didn’t do very well in this exercise is focus on tone. I spent so much time trying to work on the proportions and get the shapes right that I didn’t get much opportunity in the 10 minutes to focus on the darker and lighter areas. This is something in need to work on in my future drawings.

Overall I am mostly pleased with my drawings. I mostly captured the shape and proportions of my husband, however I am aware that I do have a long way to go in accuracy. I also need to quicken up so I have time to include tonal elements also.

Exercise 1: Basic shapes

For this exercise I was asked to arrange my model (my husband) at a slight angle in a chair. He lounged in his chair in our living room and watched tv.

I worked on white paper with a hb pencil.

I tried to block in my husbands basic shapes by looking carefully at which planes of the body are receding and which planes or lines are parallel to the edge of my picture plane.

Below is my first drawing:

A7CCD43F-5E96-4022-8386-11649203C114


With my first drawing I positioned myself in front of my husband, he was facing me but his legs were placed over the arm of the chair which meant their was a slight twist in his body. I stuck to just drawing the main shapes rather than worry about detail as I was focusing on trying to show form. Ultimately in focussing just on the shapes I think rather than showing the form of the body my drawing just looks flat. This was something I needed to improve upon for my next drawing.

Below is my second drawing:

DECF3D42-26B6-46A3-8E94-09507CD43B09

For my second drawing I positioned myself to the side of my husband. I sat down on a chair at the same level as him and began to draw. I still focussed on shape but this time I tried to refine my use of shape to include more detail such as toe nails and shirt creases. Because of where I was sat (with his feet very close to me.) This was an excellent opportunity to take advantage of my new learnt technique of foreshortening.  However this made my drawing slightly more difficult as I am accustomed in every day life to the human figures proportions. For example I know that the average adults head fits into seven and a half times the size of a human body. However with this positioning none of these proportions made sense so I really had to concentrate and everything felt wrong whilst I was drawing. However on reflection this drawing is much more successful than my first.

Below is my third drawing:

54C789B8-3514-4FE8-A25F-247D9DFD279D

For my third drawing I positioned myself slightly behind my husband but still to the side of him. I again tried to focus on just trying to outline his basic shapes, but making sure I was getting proportions and angles correct. On reflection, I did manage to capture the essence of my husbands form. However I I haven’t managed to capture the true shape of his head in this drawing and I have made his fore arms too narrow.

This exercise has really made me look at the human form and see shape. This hopefully will help me in future when drawing the human form. I found that splitting the human form up into basic shapes makes the whole process less daunting and much more helpful when working out proportion.